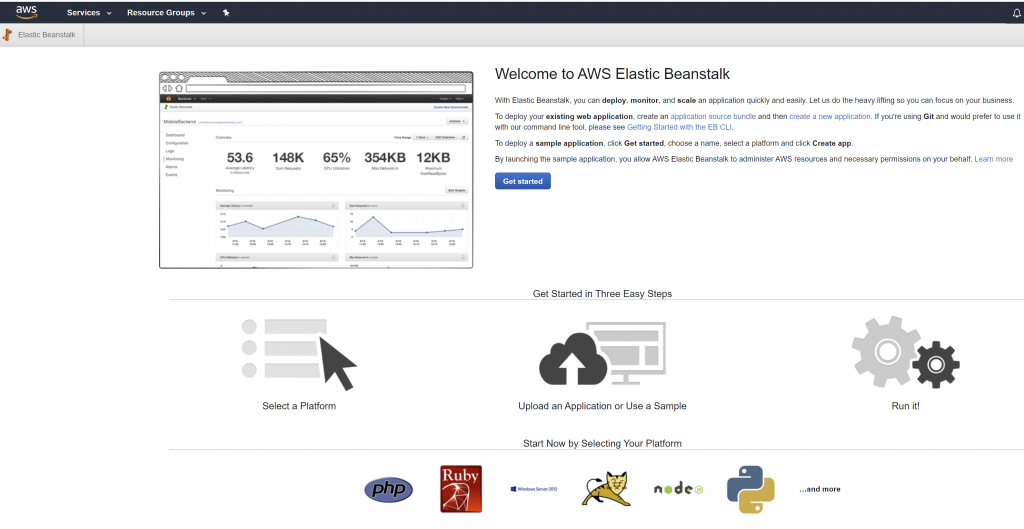
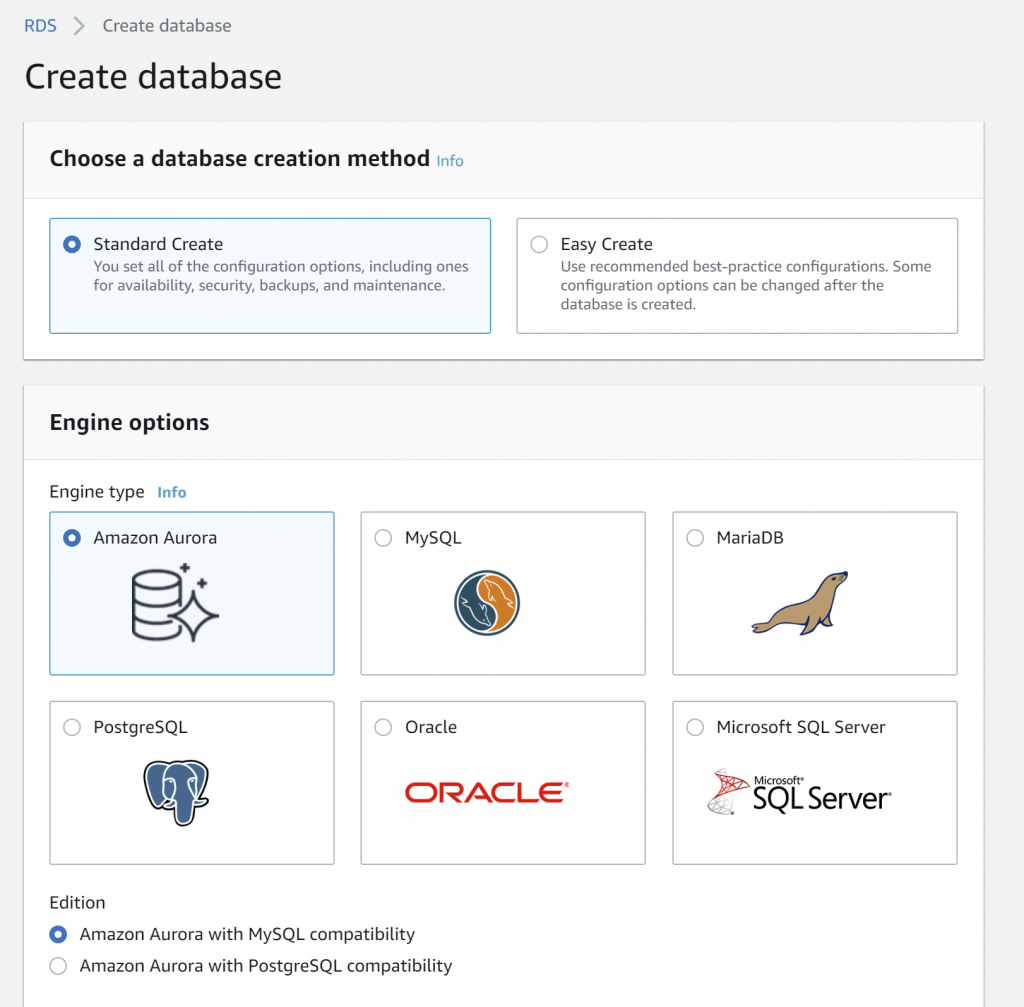
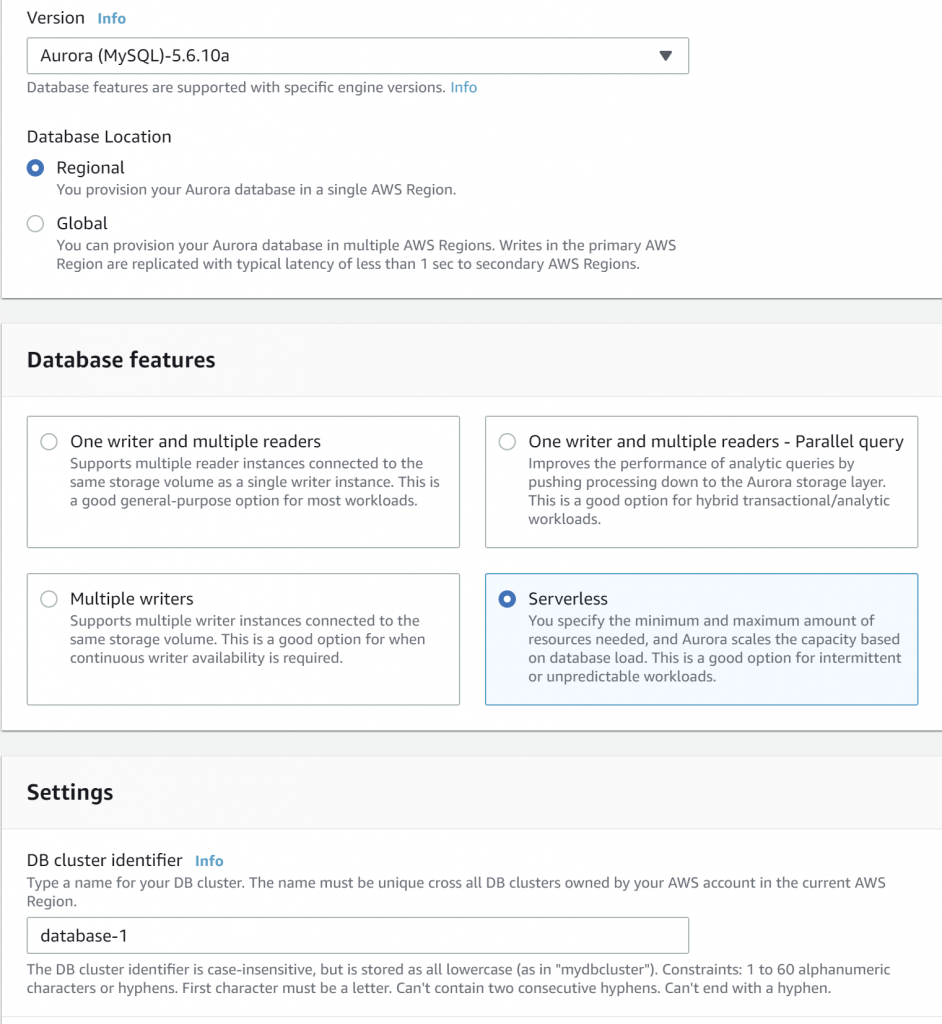
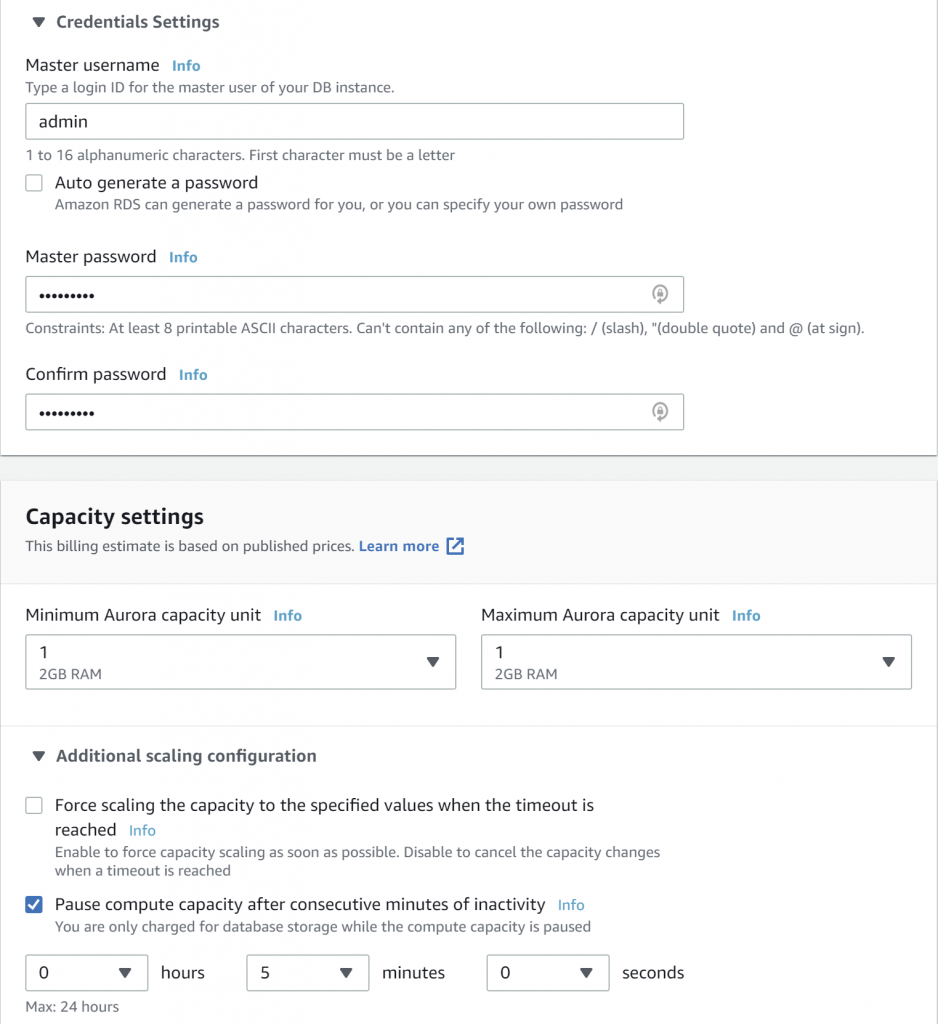
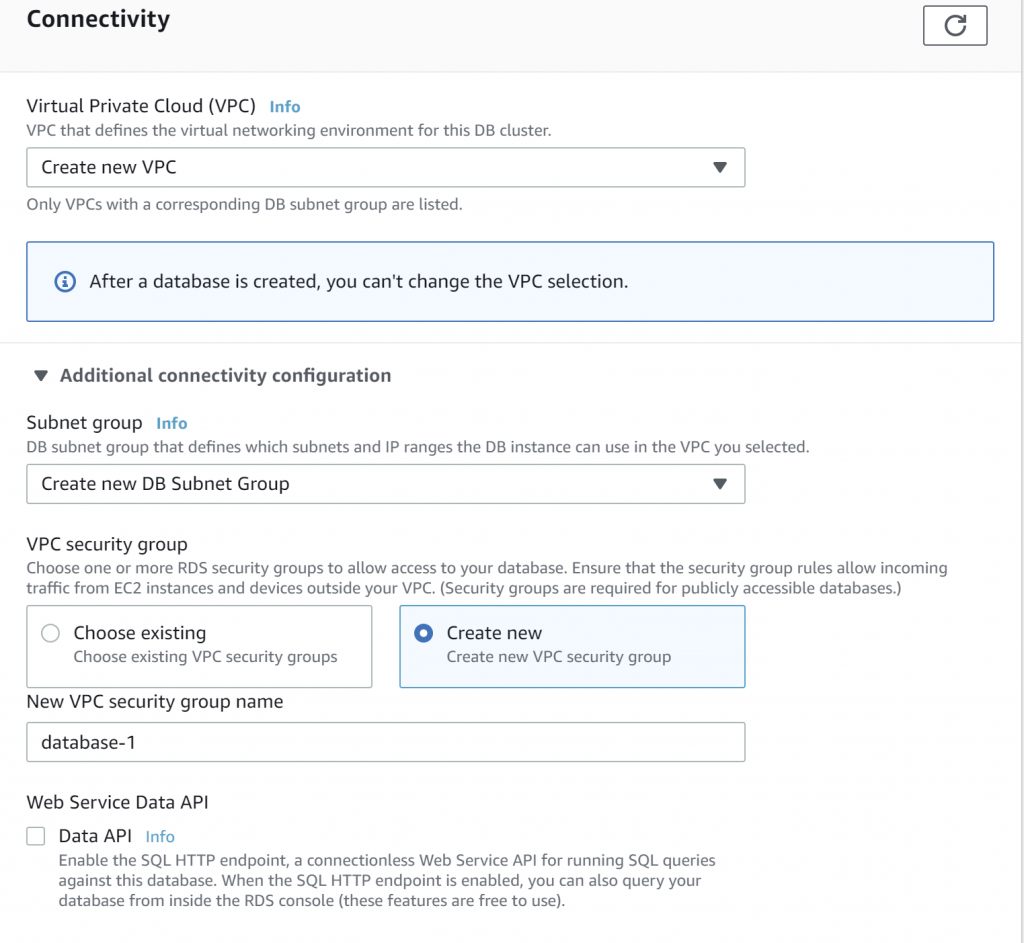
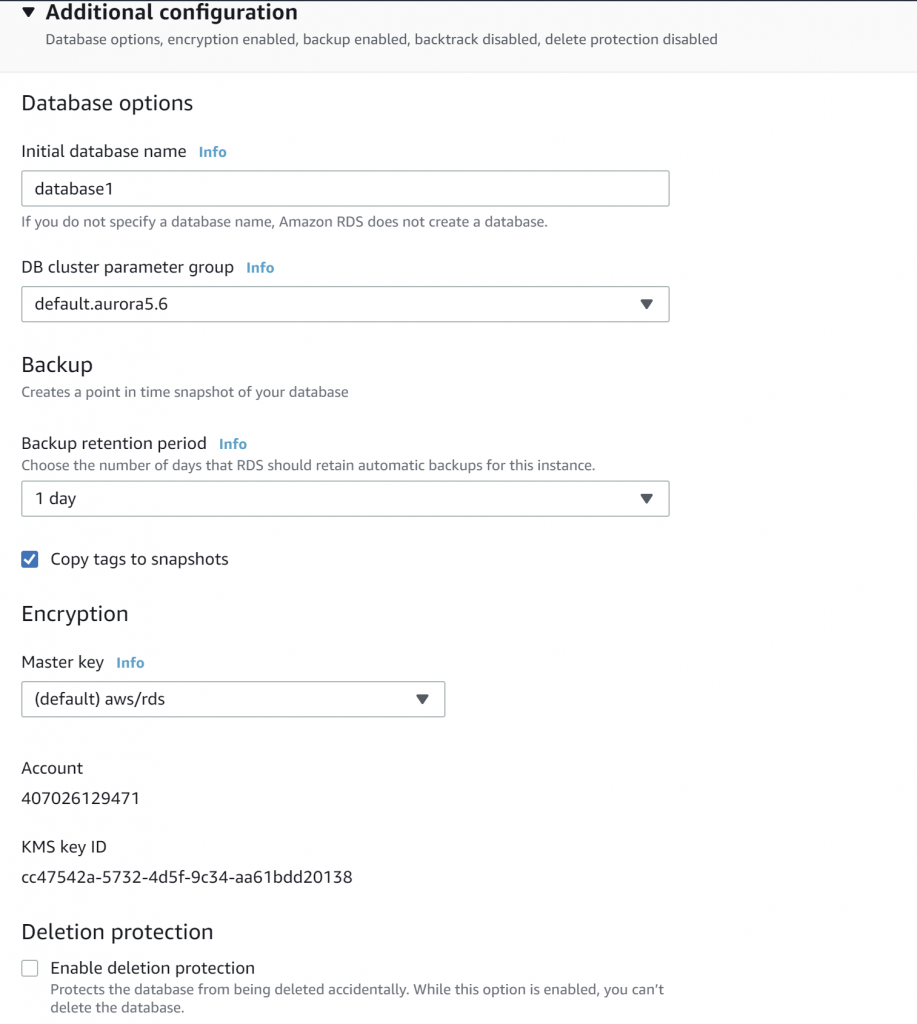
Aurora Serverless Database
Create an RDS Amazon Aurora Serverless database
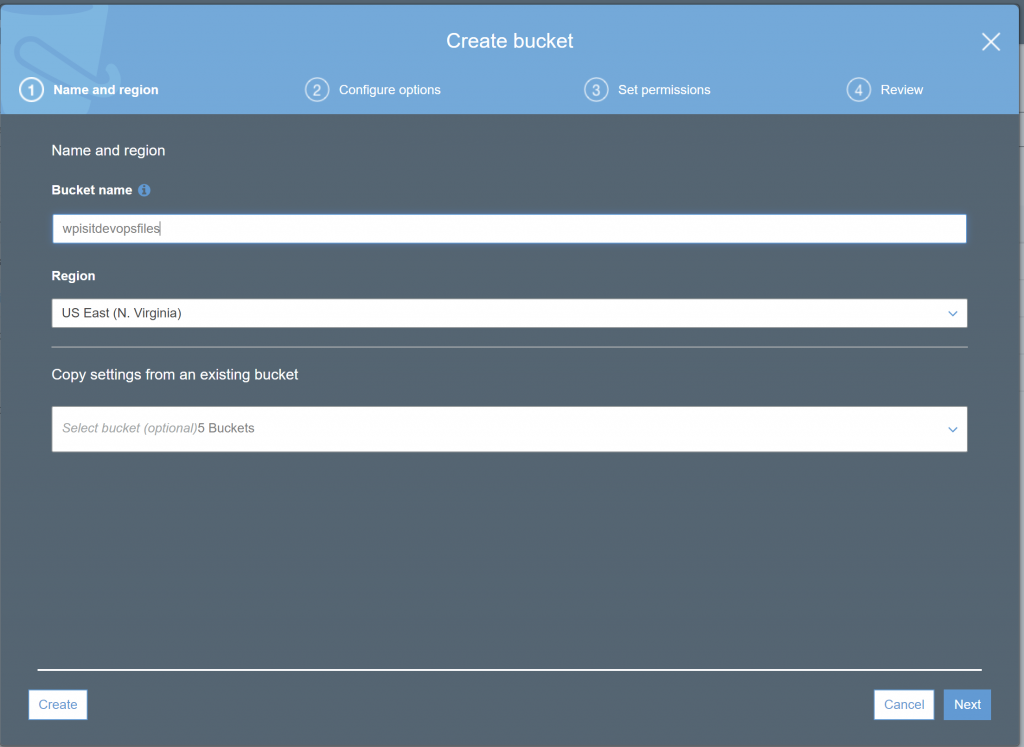
S3 Bucket
Now we create an S3 bucket where wordpress will store all uploaded files, e.g. images, photos etc
Select Next until we hot the permissions popup

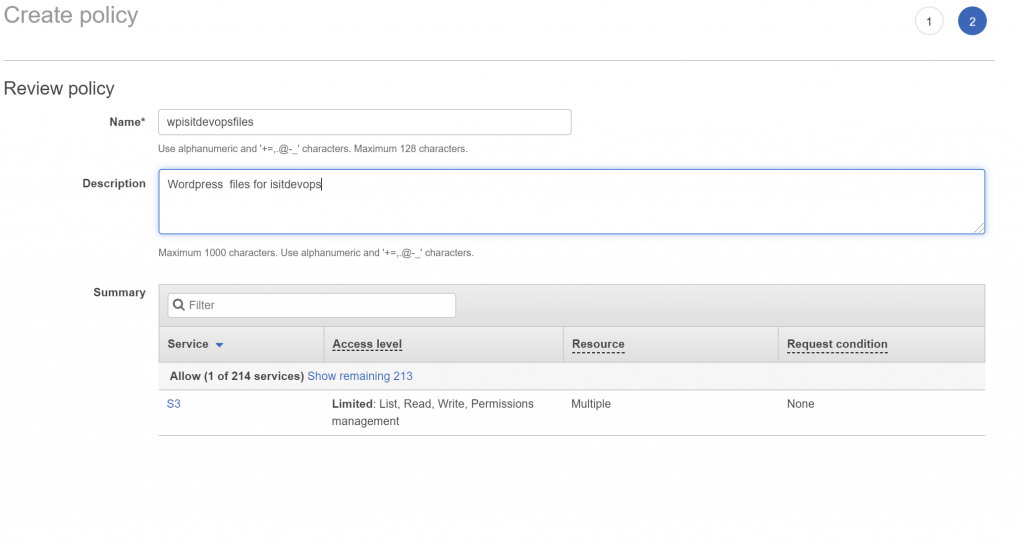
IAM policy and user
Policy Creation
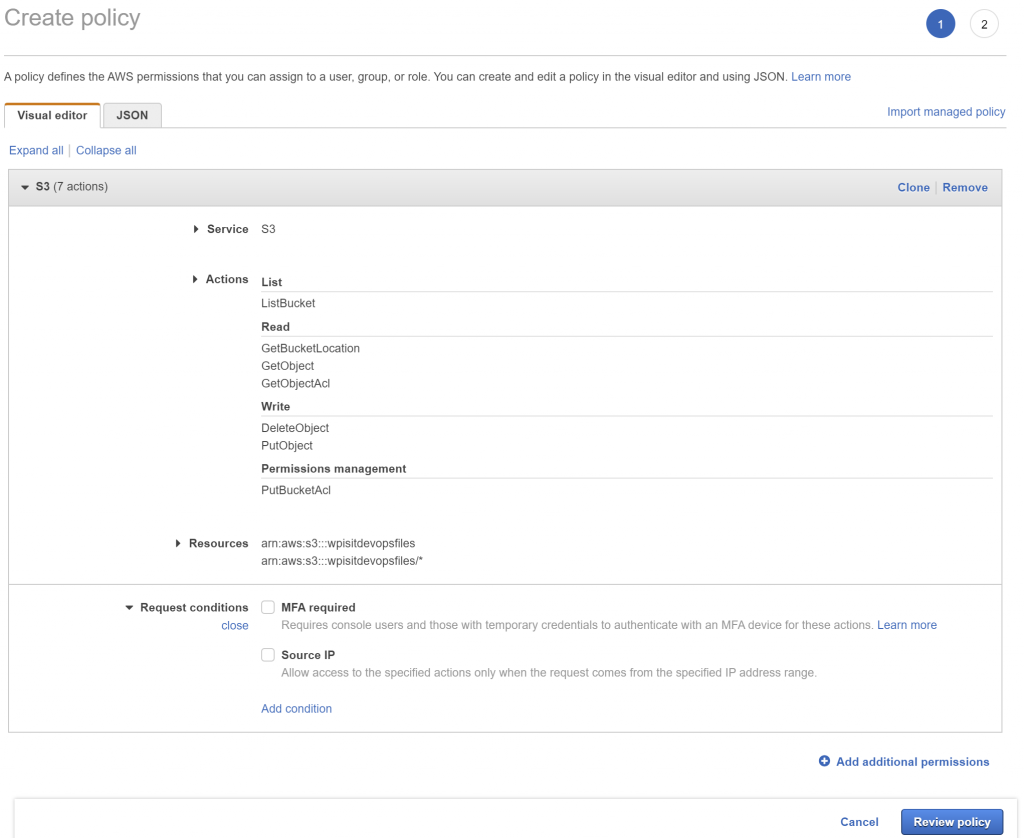
Which produc es the following json
{
     "Version": "2012-10-17",
     "Statement": [
         {
             "Sid": "VisualEditor0",
             "Effect": "Allow",
             "Action": [
                 "s3:PutObject",
                 "s3:GetObjectAcl",
                 "s3:GetObject",
                 "s3:PutBucketAcl",
                 "s3:ListBucket",
                 "s3:DeleteObject",
                 "s3:GetBucketLocation"
             ],
             "Resource": [
                 "arn:aws:s3:::wpisitdevopsfiles",
                 "arn:aws:s3:::wpisitdevopsfiles/*"
             ]
         }
     ]
 }
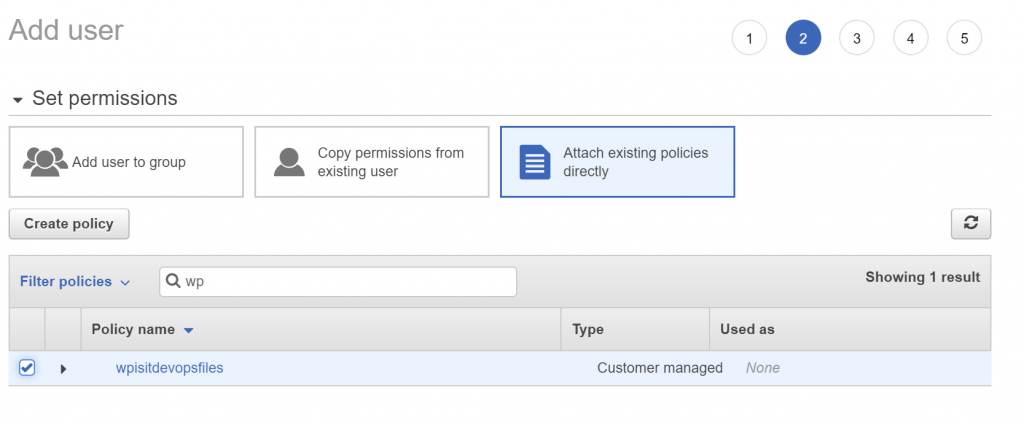
Add IAM user
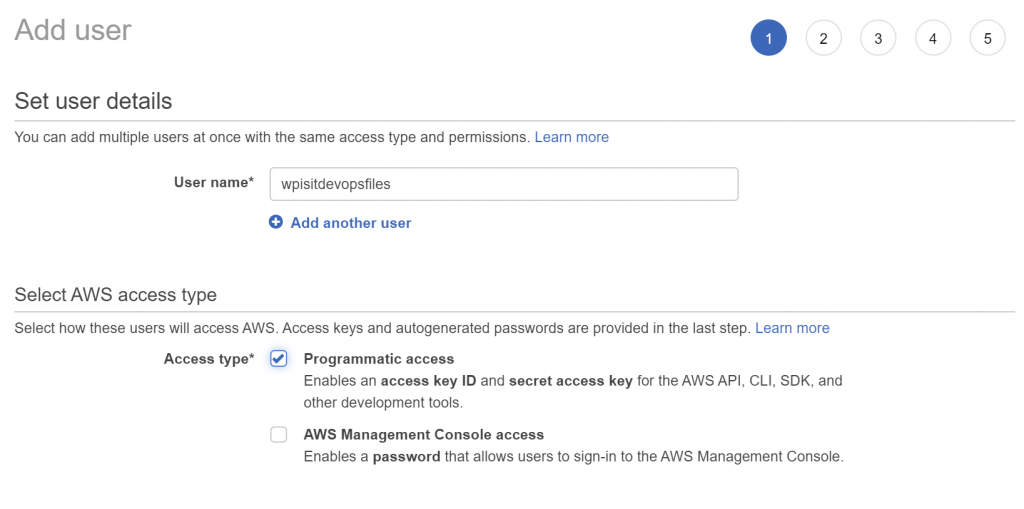
Once created you will be presented with the access key and secret access key, save these as they will be required later.
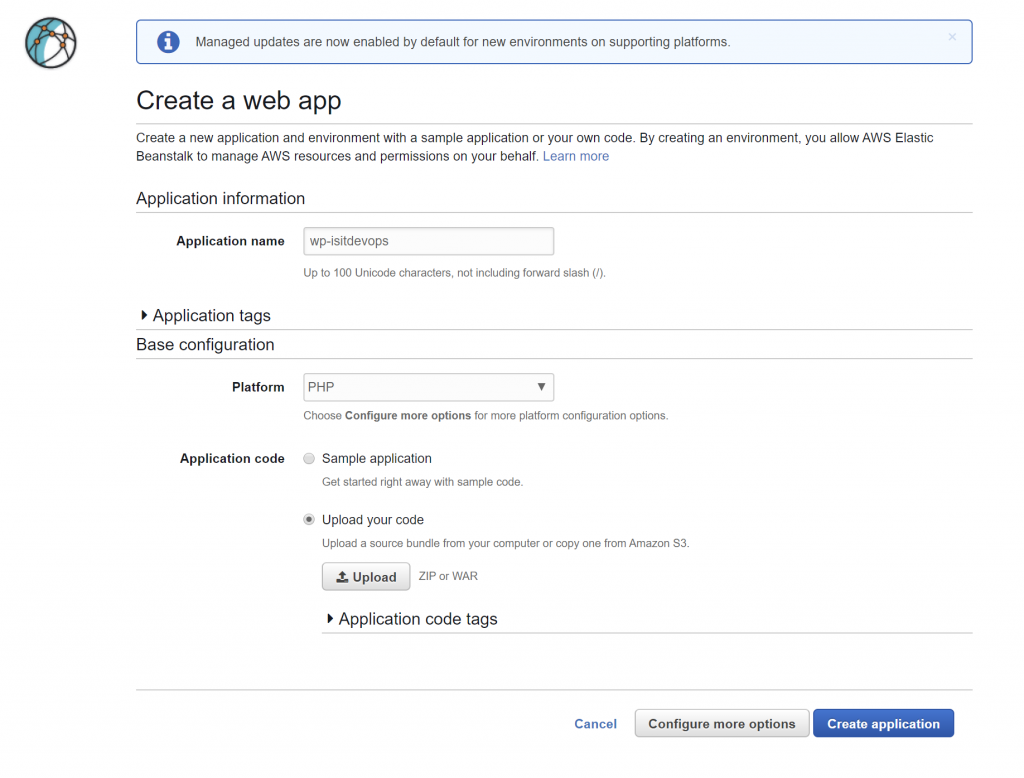
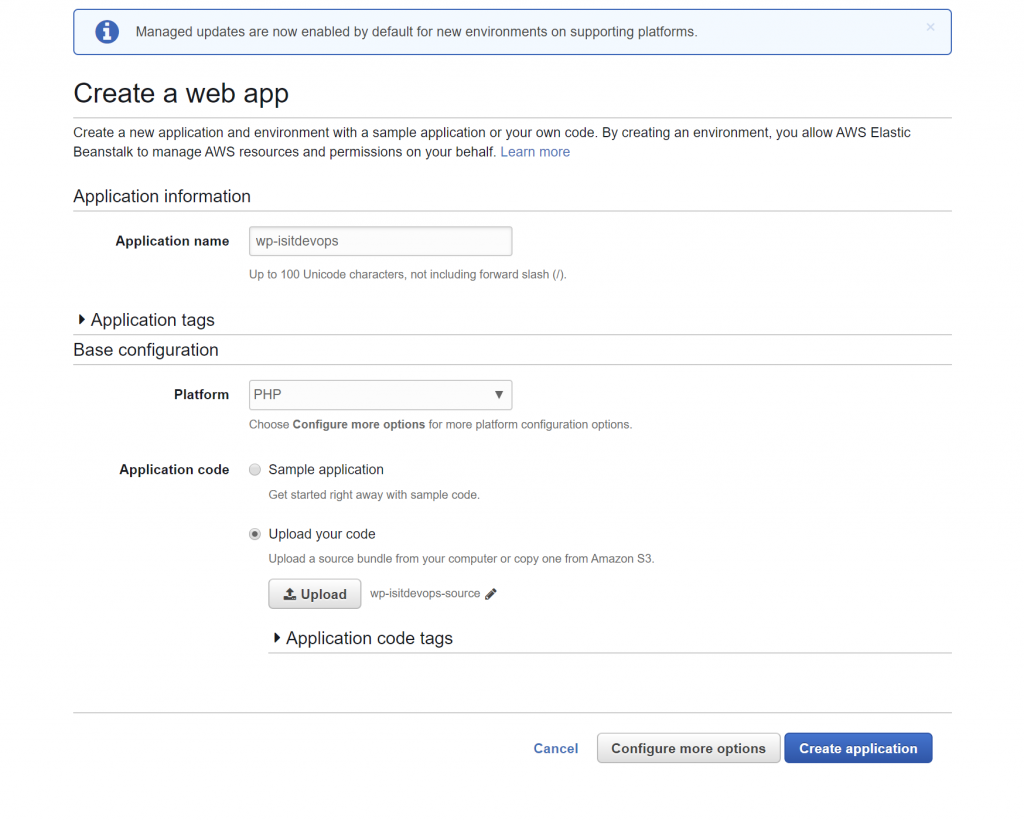
Prepare WordPress
On your laptop/PC get the wordpress site up and running locally; I use wordpress in XAMPP.
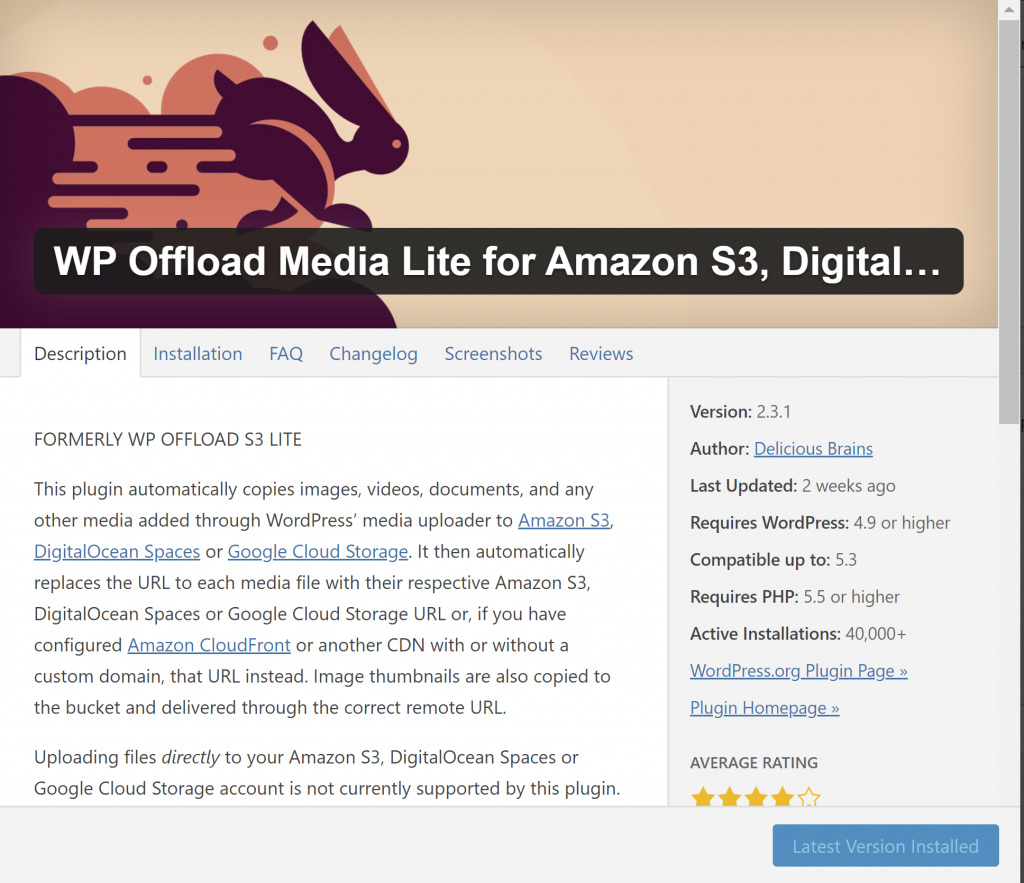
Add the following plugins to wordpress

Amend or create wp-config
IF this is an existing website then save a copy of wp-config.php before editing.

Modify the wp-config.php file to contain the following lines; the variables will be defined by the elastic beanstalk configuration file.


// AWS configuration for WP OffloadS3.
define('DBI_AWS_ACCESS_KEY_ID',     $_SERVER['AWS_ACCESS_KEY_ID']);
define('DBI_AWS_SECRET_ACCESS_KEY', $_SERVER['AWS_SECRET_ACCESS_KEY']);

// MySQL configuration.define('DB_NAME',     $_SERVER['RDS_DB_NAME']);
define('DB_USER',     $_SERVER['RDS_USERNAME']);
define('DB_PASSWORD', $_SERVER['RDS_PASSWORD']);
define('DB_HOST',     $_SERVER['RDS_HOSTNAME'] . ':' . $_SERVER['RDS_PORT']);
define('DB_CHARSET',  'utf8');
define('DB_COLLATE',  '');

// Authentication keys and salts.
define('AUTH_KEY',         $_SERVER['WP_AUTH_KEY']);
define('SECURE_AUTH_KEY',  $_SERVER['WP_SECURE_AUTH_KEY']);
define('LOGGED_IN_KEY',    $_SERVER['WP_LOGGED_IN_KEY']);
define('NONCE_KEY',        $_SERVER['WP_NONCE_KEY']);
define('AUTH_SALT',        $_SERVER['WP_AUTH_SALT']);
define('SECURE_AUTH_SALT', $_SERVER['WP_SECURE_AUTH_SALT'])
define('LOGGED_IN_SALT',   $_SERVER['WP_LOGGED_IN_SALT']);
define('NONCE_SALT',       $_SERVER['WP_NONCE_SALT']);

// Other WordPress defaults.$table_prefix = 'wp_';
define('WP_DEBUG', false);
if (!defined('ABSPATH'))
define('ABSPATH', dirname(__FILE__) . '/');
require_once(ABSPATH . 'wp-settings.php');
Elastic Beanstalk configuration files
Create a new folder wordpress/.ebextensions.
Create a new file wordpress/.ebextensions/env.config with the following contents:

option_settings:
   aws:elasticbeanstalk:application:environment:
     AWS_ACCESS_KEY_ID: 'Your Value'
     AWS_SECRET_ACCESS_KEY: 'Your Value'
     WP_AUTH_KEY: 'Your Value'
     WP_SECURE_AUTH_KEY: 'Your Value'
     WP_LOGGED_IN_KEY: 'Your Value'
     WP_NONCE_KEY: 'Your Value'
     WP_AUTH_SALT: 'Your Value'
     WP_SECURE_AUTH_SALT: 'Your Value'
     WP_LOGGED_IN_SALT: 'Your Value'
     WP_NONCE_SALT: 'Your Value'
     RDS_DB_NAME: 'Your Value'
     RDS_HOSTNAME: 'Your Value
     RDS_PORT: '3306'
     RDS_USERNAME: 'Your Value'
     RDS_PASSWORD: 'Your Value'

The WP_ keys will be the values from the original wp_config.php file.

The AWS_ and RDS_ values are those used/provided when you created the user and the database.
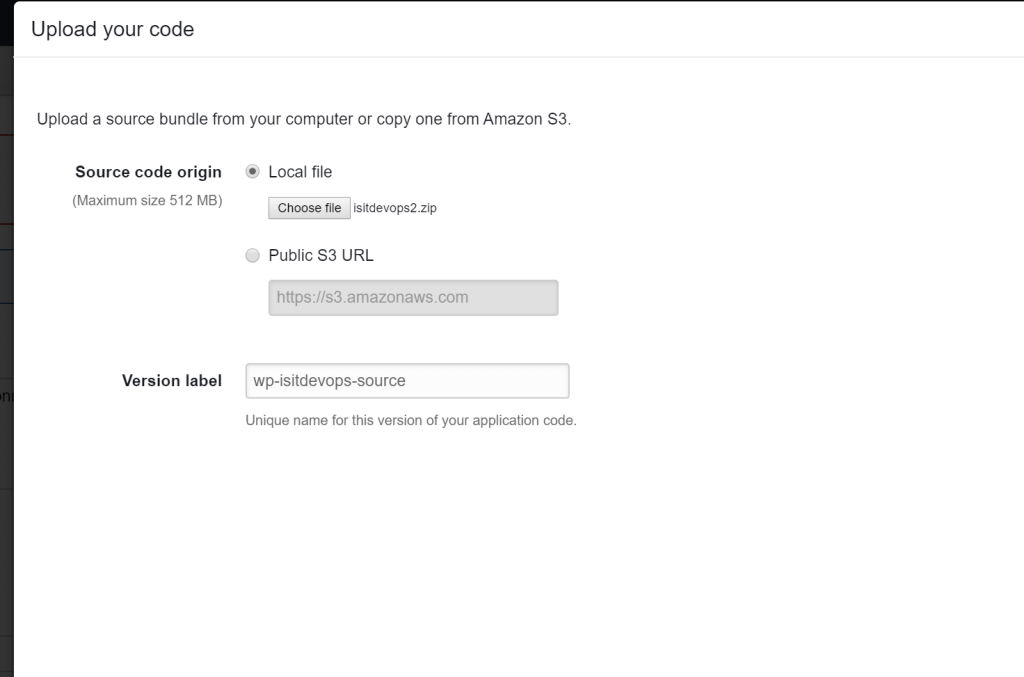
Upload WordPress
Create a zip bundle of the wordpress files created from inside the wordpress top level directory i.e. do this from inside the directory and do not include the actual directory file itself.
If you are migrating a wordpress site
This section should be followed if you are migrating a wordpress site rather than creating a new one.
We will need to import the database into AWS.
Run a cmd window as the Administrator and enter:
mysqldump -ulocaluser--databasesworld--single-transaction --compress --order-by-primary -plocalpassword| mysql -urdsuser--port=3306--host=myinstance.123456789012.us-east-1.rds.amazonaws.com-prdspassword